
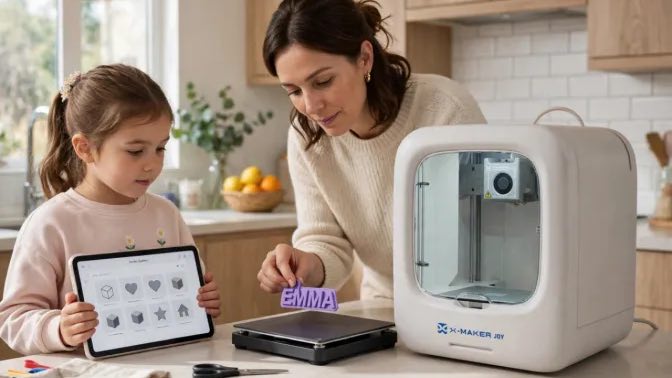
Our kitchen drawer holds a rolling pin and a baking tray. The cutters in there never match the shape my daughter wants. A small home printer changes that last part. My daughter drew a star with one bent point. She wanted a star for her lunchbox. I checked the size against the biscuit tin. The printer made a cutter that fit that drawing.
As part of our food blog, this article stays with kitchen work that is simple to test. Cutters first. Then stamps, stencils, and holders. Stencils get a short section too. Timing and cleaning get covered too. So do the checks an adult should make before food touches a printed part. No workshop needed. No long print either.
Why a printed cutter fits kitchen work
Shop cutters come in fixed sizes. Ours did not fit the small tin my daughter takes to school. A printed cutter can match that tin. It can match her lunchbox too. Or her hand. I scaled her star down. Printed one test. Checked it against the tin before we rolled any dough.
New families often start small. With a machine made for children. Companies like AOSEED for example, sell printers in its kids range, and the range page lists models made for younger makers. Kitchen work does not need a large machine. A cutter is thin. Flat. Light. A compact printer handles it. Setup stays short.
Start with shapes that print clean
Round, square, and simple animal outlines print well. A star with short points prints well. A long, thin tail snaps. Letters work when the strokes stay thick. Thick enough to press without bending. First batch: five simple shapes. Detailed outlines wait for the second batch.
From a drawing to a cutter
A child can start on paper. Draw the shape. Check every line joins. Check no part is thinner than a pencil line. Thin lines snap in dough. Then a parent traces it. Or rebuilds it in a simple design tool. Many ready-made cutter files also exist, and those are a good first step for a family that does not want to design from scratch. Watch this video to learn more:

Kitchen projects beyond the cutter
Once a cutter works, a family often tries a stamp. A stamp presses a pattern into dough. It does not cut. A flower works. So do dots. Or a short word for a party biscuit. The stamp needs a flat back. And a handle a small hand can hold. Test the handle first. We tested the handle on scrap dough first. Her flower stamp marked the party biscuits.
Holders, measures, and small helpers
Our cutters lived loose in a drawer. They tangled. They went missing. A printed holder fixed that. One open box. Sized to the cutters we actually own. It sits on the shelf by the mixer. Nothing else in it.
A holder that earns its shelf space
Measure the tallest cutter first. Then add a little room above it. If the holder is too tight, cutters will catch when a child pulls one out. If it is too loose, the set will rattle and slide. One set per holder. Only that set. That stays tidier than a large box full of spare kitchen parts.
Timing a kitchen print without guessing
Print time depends on size, height, and detail. A flat cutter is a short job. A tall holder is longer. Many small parts take longer than one flat shape of the same size. The printer traces every edge. On every layer. Our first cutter took under an hour.
A useful starting point is to check the guide of your printer on how long a 3D print takes, which gives planning ranges for common family prints. Ours lists a cookie cutter at 45 minutes to 2 hours. Width and detail change the time. That range is a planning guide. Not a promise for one exact file. Check the slicer estimate for your own cutter before starting.
How about making a birthday cake topper? Watch this video:

What slows a cutter down
Width is the first factor. A wider outline means more travel on every layer. Height is the second factor, but a cutter is low, so height rarely causes trouble here. Fine detail is the third factor. A tiny inner shape adds travel and time without adding much to the finished biscuit. Keep inner detail simple on a first print.
Food, cleaning, and adult checks
A printed cutter touches food. Cleaning matters. Handling matters. Before first use, an adult checks the material. Checks for rough edges. Checks for loose strands. Then washes the cutter. Our first cutter passed all three checks. A cracked wall means no food use. A loose layer means the same. Set that cutter aside. Print a fresh one.
Heat is another check. A printed cutter is not a baking tray. It should not go into a hot oven. Cut cold dough. Lift the cutter away before baking. Store cutters dry. Away from heat. Check them again after a few uses. Ours live in a dry cupboard above the counter. Warped means replace. Cracked means replace. No glue repairs for food use.
Washing is part of the routine now. Warm water and a little dish soap do the work. I scrub the cutting edge with a soft brush and rinse it clean. Then I stand the cutter on its side to dry. A damp cutter goes back in the drawer and smells stale by morning, so I never skip the drying step. Once a week I check the edge. A crack or a rough nick means the cutter is done. Small grooves hold dough and crumbs, and no amount of scrubbing gets them fully clean.
Conclusion
Small works best for a kitchen printer project. One cutter. One test press. One tray of biscuits. Then a stamp. Then a holder. Test each one before the next starts. That pace gives a child a finished object to use. It gives a parent a clear view of time. Of cost. Of cleaning.
Start with a shape a child drew. Print it flat. Check the fit on the tray. Clean edge. Washes well. Then the project has done its job. The next shape can be a little harder.
- About the Author
- Latest Posts


Mehru Sheikh is a Dallas-born, Brooklyn-based writer, traveler, and product manager who believes good food is the world’s most universal language. After moving to New York City in 2020, she channeled her passion for exploration into @sheikhshack_ — a lifestyle platform covering food, fashion, and travel that grew from a personal travel diary into a community of nearly 7,000 followers. Known for her fast-travel approach — squeezing as much as possible into short trips — Mehru has become a go-to voice for practical, culturally immersive travel, particularly within the South Asian community. She has ghost-written for travel blogs, previously ran her own food page, and co-founded Table for Four, an events company connecting New Yorkers to new experiences and each other. At New York Street Food, she brings that same curiosity and appetite to uncovering Brooklyn and NYC’s most exciting, flavor-forward dining destinations.
- From Edible to Printable: Cookie Cutters and Kitchen Projects Kids Can 3D Print
- A Himalayan Pantry Guide to Jackson Heights: What to Buy, From Timur Pepper to Mad Honey
- 5 Benefits of Using Margarita Salt Paper Straws Instead of Salt Rims
- From Puebla to Red Hook: The History of NYC's Latin American Street Food Markets
- All About Tarrazú Coffee: The Crown Jewel of Central America